Kitchen Floor

Ceramic Floor Tile and Grout Renovation Dedham

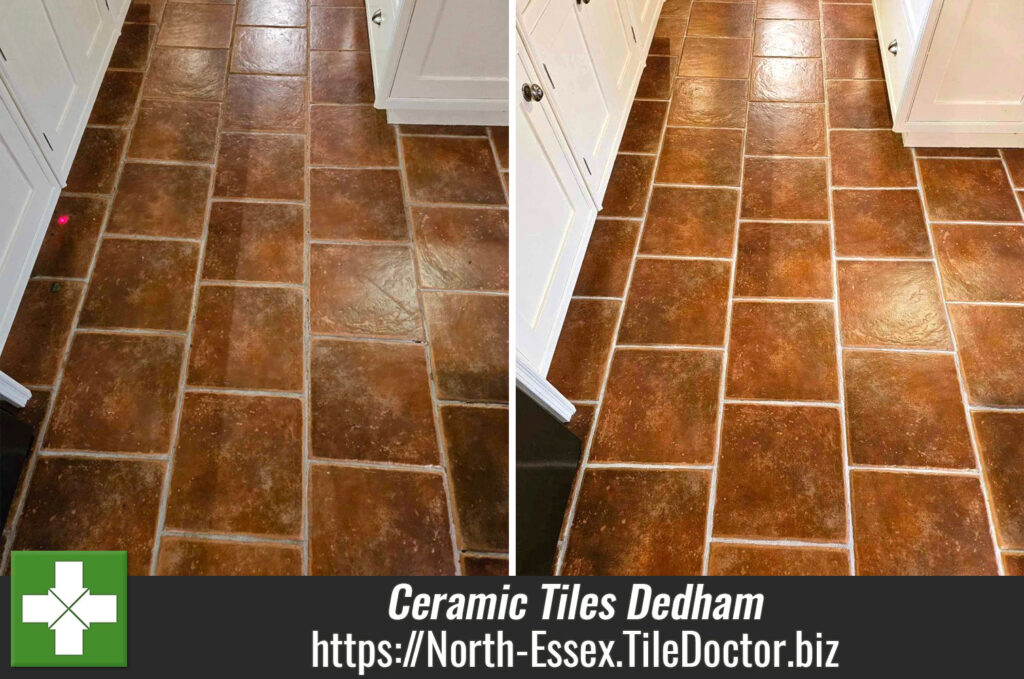
Ceramic Kitchen Floor Tile and Grout Renovated in Dedham Essex

A homeowner from the village of Dedham near Colchester asked me to visit regarding their Ceramic tiled kitchen floor. The client was tired of the dirty looking Ceramic tile and grout and having tried all the general household cleaners on the market were frustrated that it still didn’t look clean. It was bringing down the overall appearance of the kitchen and decided it was time to call in some professional help.
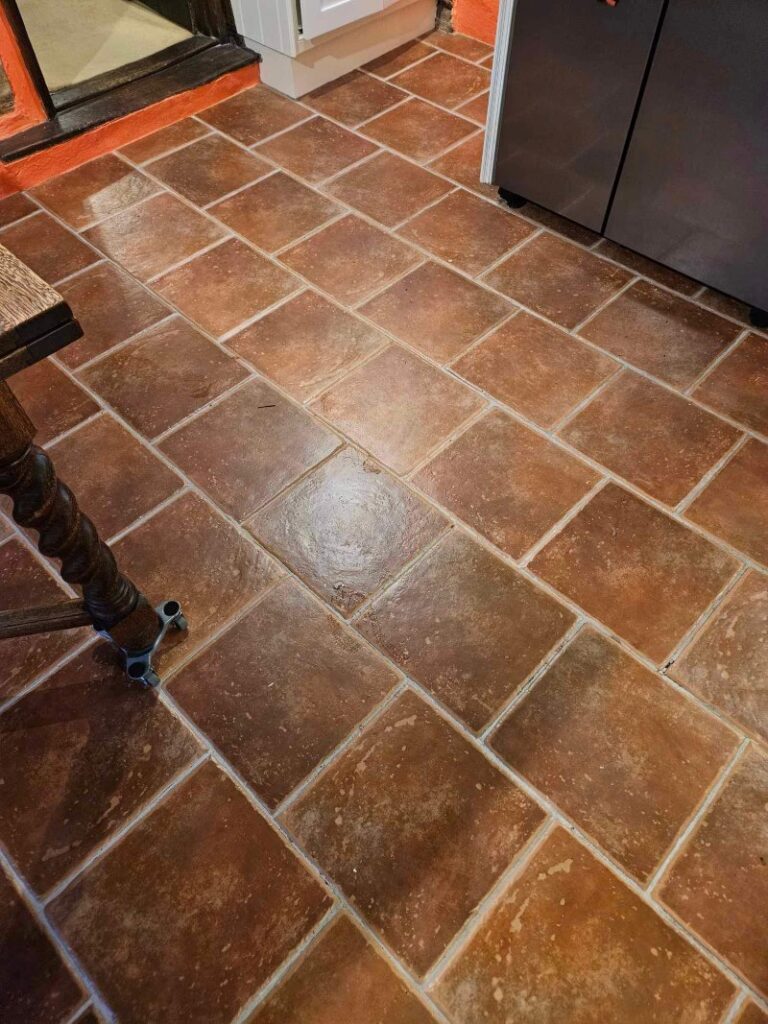
Ceramic Tiled Kitchen Floor Before Renovation Dedham

I visited the property to inspect the floor and confident we could make a significant difference discussed with them the options. They were happy to go ahead with my quote and we arranged a suitable date a few weeks later to carry out the work, which would just take a day.

Cleaning a Ceramic Tiled Kitchen

Work started with cleaning the floor using a strong dilution of Tile Doctor Pro-Clean which is a powerful alkaline tile and grout cleaner. I like to leave it to soak into the tiles first for about ten minutes before working it into the tiles and grout with a black scrubbing pad fitted to a rotary floor machine. I also like to give the grout a good scrub by hand as the pads can struggle to reach into the recesses of the grout lines. A few areas were particularly stubborn, so we reapplied and scrubbed again.

Once done the floor was rinsed with water and all the liquids and soiling removed with a wet vacuum. After inspecting the floor for further cleaning, I noticed a few areas that had missing grout. we always keep some grout on the van, so it was not a problem to replace it.

Once the floor and grout were dry, a further inspection was carried out and although the grout was much cleaner some areas has deep seated staining that no end of scrubbing could shift. I had discussed this possibility with the owner earlier and so it was agreed to colour the grout using a Tile Doctor Grout Colourant in Limestone.

Grout Colouring is a straightforward process using a small brush to paint the colourant onto the grout. This forms a barrier over the grout giving it a uniform appearance whilst protecting it going forward. This gave the floor a clean fresh appearance that really uplifted the look of the kitchen, it was definitely the best solution.

Sealing Ceramic Tiled Kitchen Floor

Ceramic tiles have a glazed surface so there is no need to apply any type of sealant to protect them. However, for aftercare cleaning we left a free bottle of Tile Doctor Neutral Tile Cleaner for the client to use to maintain their floor. This is preferable to the stronger acidic household cleaners which she had been using previously.
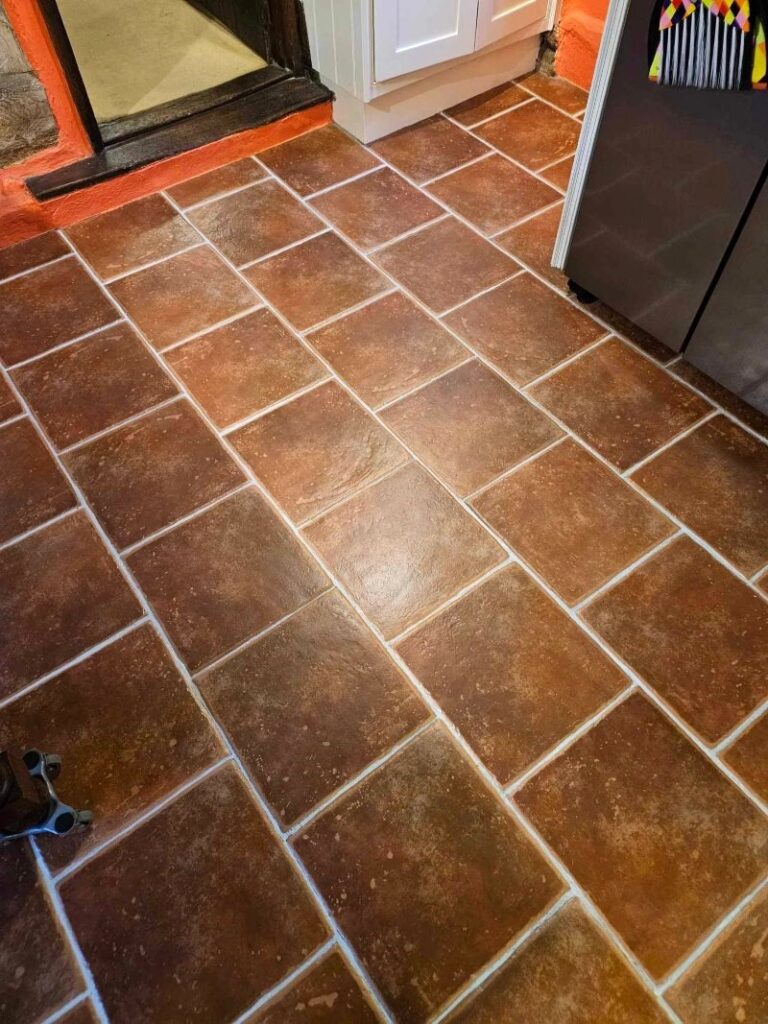
Ceramic Tiled Kitchen Floor After Renovation Dedham

Once done the floor looked great, and my client was very happy that the kitchen now looked as it should.


Professional Renovation of a Ceramic Tiled Kitchen Floor in Essex

Ceramic Kitchen Floor Tile and Grout Renovated in Dedham Essex Read More »

Terracotta Tiled Floor Deep Cleaned and Sealed in Wivenhoe Essex

Blending New and Old Terracotta Floors Tiles in Wivenhoe Colchester

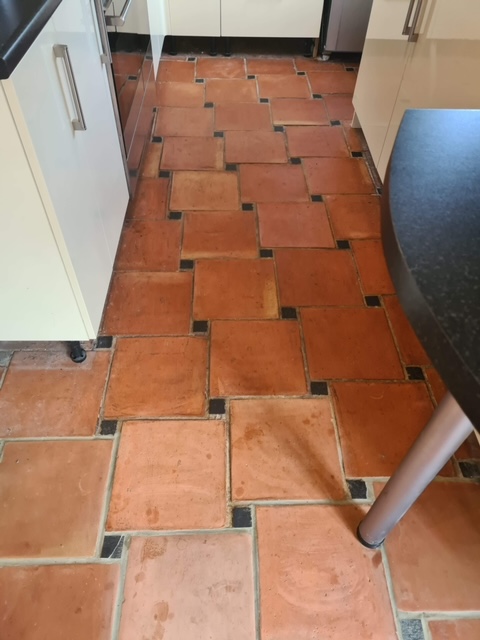
This Terracotta tiled floor with Black tomettes was installed in the kitchen of a house in the town of Wivenhoe, south of Colchester. The floor had been partly replaced due to a water leak and the difference between the new and original was noticeable. Unhappy with the appearance the owner contacted me to see if anything could be done.

Terracotta Tiled Kitchen Floor Before Cleaning Wivenhoe Terracotta Tiled Kitchen Floor Before Cleaning Wivenhoe

I visited the property to survey the Terracotta floor and I could see solution would be to deep clean the whole floor, including the Grout and then reseal with a sealer that would bring out the beauty in the tile and give both sections the same appearance. Happy to proceed with my plan we scheduled a date for the work to be done a few weeks later.

Terracotta Tiled Kitchen Floor Before Cleaning Wivenhoe

Cleaning a Terracotta Tiled Kitchen Floor

Cleaning started with the spraying the Terracotta floor with a dilution of Tile Doctor Pro-Clean which is our go to tile and grout cleaning product. After spraying onto the tile and grout it is then then left to soak in for around ten minutes before being scrubbed in using a rotary machine fitted with a black scrubbing pad. This process removed the many years of dirt that had built up in the original floor and got both areas clean to the same standard. Two litres of Pro-Clean was used during this process and a wet vacuum was used to extract the soiling and water used to rinse the floor after scrubbing. Pro-Clean is an alkaline product so once satisfied the floor was clean it was given a good rinse with water and further extraction to neutralise the pH of the floor after cleaning.

Sealing a Terracotta Tiled Kitchen Floor

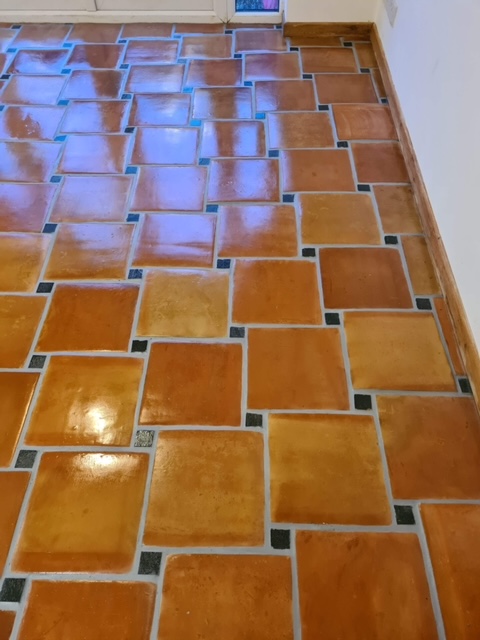
The floor was left to dry out overnight and after checking moisture levels the following day it was sealed with five coats of Tile Doctor Seal & Go which is a water-based sealer that adds a subtle sheen finish. Terracotta being made from clay is very porous and so absorbed two litres of sealer before it was fully sealed and protected from ingrained dirt.

Terracotta Tiled Kitchen Floor After Cleaning Sealing Wivenhoe

The new sealer did a great job of blending in the appearance of the new and old Terracotta floor and will make future cleaning much easier. Speaking of which, I recommend using Tile Doctor Neutral Tile Cleaner for regular cleaning, it’s a pH neutral tile cleaning product that can be used daily if required. It’s a mild cleaning product that won’t strip the tiles of the newly applied sealer like many strong household cleaners can. It’s also concentrated so a small amount goes along way.

Terracotta Tiled Kitchen Floor After Cleaning Sealing Wivenhoe Terracotta Tiled Kitchen Floor After Cleaning Sealing Wivenhoe


Professional Renovation of a Terracotta Tiled Kitchen Floor in Essex

Blending New and Old Terracotta Floors Tiles in Wivenhoe Colchester Read More »

Travertine Tiled Kitchen Floor Before and After Cleaning Saffron Walden

Neglected Tumbled Travertine Floor Renovated in Saffron Walden

We recently visited a property in Saffron Walden, a pretty market town in Essex, where the owner asked us to look at her Tumbled Travertine kitchen floor. The floor had been laid and sealed around 10 years prior and the pits in the Travertine had become very dirty with trapped dirt, the floor now had a grubby neglected look about it. No matter how much they tried to clean with a multitude of household cleaners, the floor had become worse and worse which is not unusual as strong chemicals can strip off the sealer completely which protects the floor.

Tumbled Travertine Before Cleaning Saffron Walden Tumbled Travertine Before Cleaning Saffron Walden

It was clear that the original sealer was no longer doing its job and so I discussed the options for renovating the floor whilst carrying out a test clean. Sealers rarely last ten years, in my experience three years is about the maximum you can expect regardless of manufacturers claims. The test clean went well and we agreed a price and a timescale for the work and scheduled it for the following week.

Cleaning a Tumbled Travertine Tiled Kitchen Floor

It’s not a good idea to apply a different sealer on top of the original unless you know they are compatible, also you can end up with uneven layers so our first step was to strip off any remaining sealer and clean the floor. To do this we used Tile Doctor Remove and Go which is designed for the removal of coatings on tiles such as sealers, adhesives and paints. This product is also great for drawing out ingrained stains and removing heavy grease build-up. It can be used on both vertical and horizontal surfaces. We applied and let it soak into the pores of the Travertine for ten minutes before working it in.

To work the product into the stone and get deep into the pits a coarse 200-grit burnishing pad fitted to a rotary buffing machine was run over the floor and lubricated with plenty of water. After than the floor was rinsed with water and the slurry extracted with a wet vacuum. With the floor clean the process was repeated with finer grades of pads from 800-grit through to 1500-grit. As before between pad the floor was rinsed thoroughly to remove any trace of slurry off the tiles and the slurry extracted with the wet vacuum; the more thorough the rinse the better the finish. By the end of day one the cleaning process was completed, stripped of any coatings and the floor looked much better and lighter in appearance which made the room seem bigger.

Sealing a Tumbled Travertine Tiled Kitchen Floor

The Travertine tiles were left to dry off fully overnight and I started on the second day with a floor inspection to ensure the floor was ready for sealing. At that point I could see that there were a few small areas that needed further attention, so I spot treated them with Hand Burnishing Block. This was followed by spray-burnishing the floor with a very fine 3000-grit polishing pad which is applied using a little water sprayed on to the Travertine. This very fine pad left the floor with a natural looking sheen.

Once we completed this and were satisfied with the finish, all that remained was the sealing of the floor, this will protect it and prevent the dirt from impregnating the pores in the stone. Three coats of Tile Doctor Colour Grow were applied, leaving thirty minutes drying time between each coat. Colour Grow is an impregnating and colour enhancing sealer which leaves the floor resistant to staining and spills whilst improving the natural brown shades in the Travertine resulting in a lovely finish.

The client was very satisfied with the finish, the whole room had been lifted, looking much lighter and brighter.

Tumbled Travertine After Cleaning Saffron Walden Tumbled Travertine After Cleaning Saffron Walden


Professional Restoration of Tumbled Travertine Tiled Kitchen in North Essex

Neglected Tumbled Travertine Floor Renovated in Saffron Walden Read More »

Scroll to Top