tile sealing

Encaustic Tiled Bathroom Floor Renovation Saffron Walden

Encaustic Tiled Bathroom – Saffron Walden, Essex

This modern Encaustic tiled floor had been laid in the bathroom of a house in Saffron Walden about a year prior to my visit. It was now beginning to mark easily and its appearance had diminished, additionally my customer was finding it hard to keep clean. All these issues are classic symptoms of the sealer wearing down, so I recommended giving the floor a deep clean with burnishing pads and then resealing. It was only a small floor so the process should only take a day.
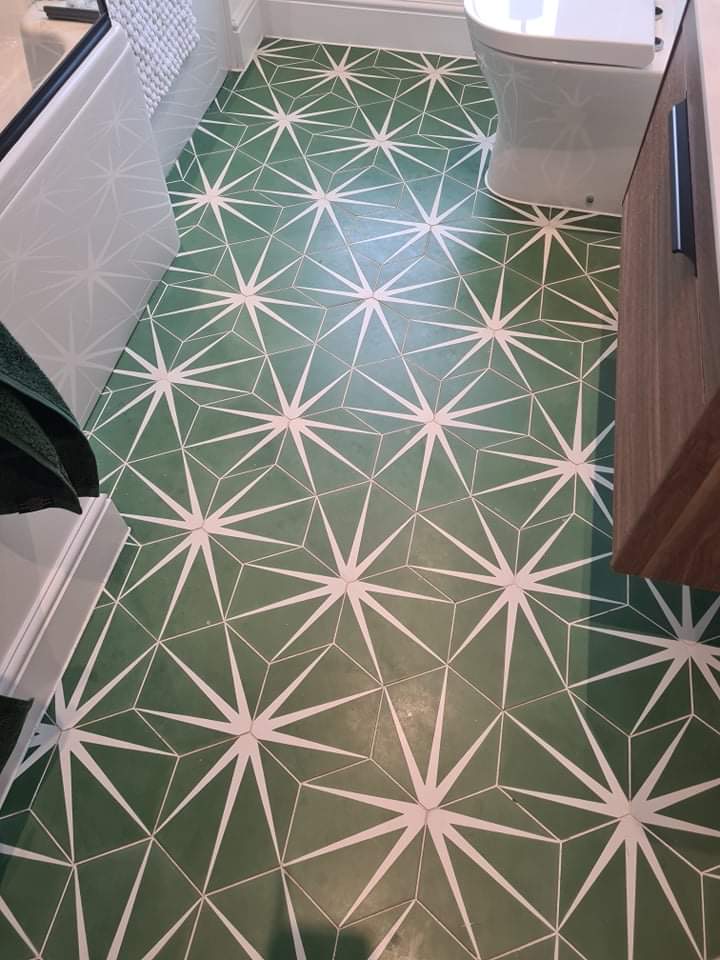
Encaustic Tiled Bathroom Floor Before Cleaning Saffron Walden

Modern Encaustic tiles are very popular these days due to the spectacular colours and patterns available and they do look great in smaller areas such as bathrooms. Many varieties do require you to maintain the sealer though and this requirement is often overlooked when being sold. This is not usually a problem when used to create a wall feature, however when installed on a floor you can expect the sealer to wear down with foot traffic. Once the sealer wears down it allows dirt to become ingrained in the tile and this becomes difficult to remove, thereby making the floor difficult to keep clean.

Another problem we find with sealed tiles in bathrooms and kitchens is the use of bleach-based cleaning products, the products are very strong and will quickly erode the sealer with regular use leaving the tiles vulnerable. This is why we always recommend the use of pH neutral tile maintenance products such as Tile Doctor Neutral Tile Cleaner.

Cleaning an Encaustic Tiled Bathroom Floor

To resolve the problem, I started with the application of a coarse 400-grit burnishing pad fitted to a rotary machine and lubricated with water. The floor was just big enough to squeeze the buffer machine in, and it made quick work of removing what was left of the old sealer and ingrained dirt. After a rinse with more water, the soiling was extracted with a wet vacuum and I repeated the process with the 800 and 1500-grit pads, rinsing and extracting after each pad. These pads gradually refine the tile and slowly build-up a polish on its surface.

Finally, I moved onto the very fine 3000-grit pad which is applied with only a mist of water sprayed onto the surface to bring up the final polished appearance. This last pad has the added advantage of leaving the tiles fairly dry, however, just to be sure I installed a couple of down blowers to fully dry out the floor before sealing.

Sealing an Encaustic Tiled Bathroom Floor

The blowers worked well, and I was able to seal the floor later that day using four coats of Tile Doctor Colour Grow using around a litre of sealer. This is an impregnating sealer that works by soaking into the tiles, where it occupies the pores to prevent dirt from becoming ingrained there.

Encaustic Tiled Bathroom Floor After Cleaning Sealing Saffron Walden

The appearance of the encaustic tiles now looks great with a nice even, easy to maintain sheen. I also left them a free bottle of Tile Doctor Neutral Tile Cleaner to maintain their floor after we had finished.


Professional Restoration of an Encaustic Tiled Bathroom Floor in North Essex

Encaustic Tiled Bathroom – Saffron Walden, Essex Read More »

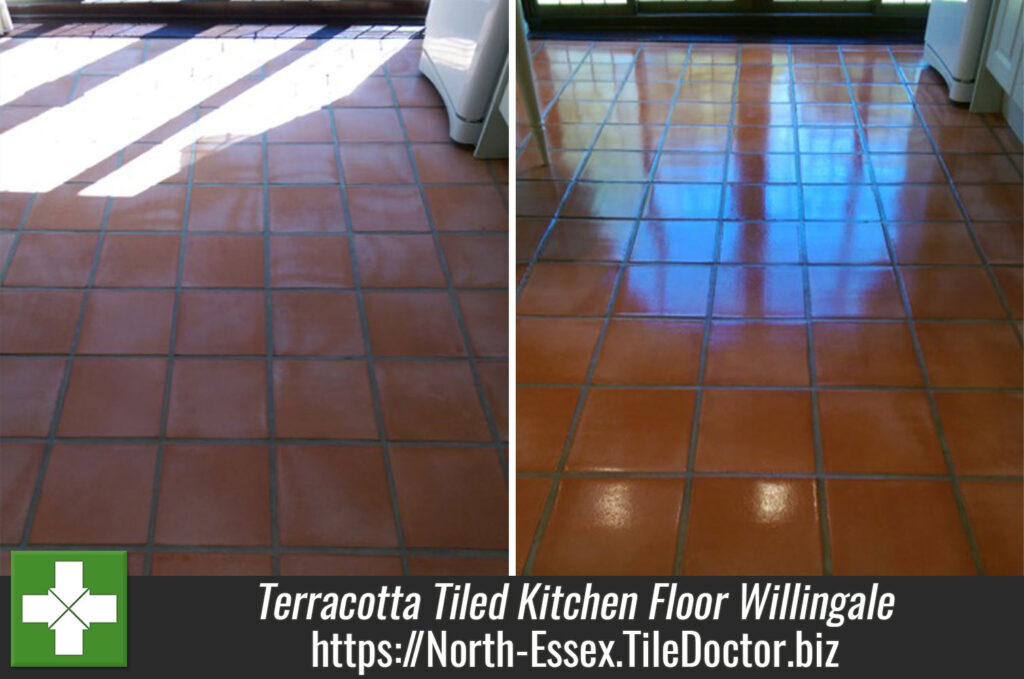
Terracotta Tiled Kitchen Cleaned and Sealed in Willingale

Terracotta Tiled Kitchen Floor Repaired, Cleaned and Sealed in Willingale

This Terracotta tiled kitchen in the village of Willingale near Maldon, in the Epping Forest District of Essex had lost its finish and looked slightly dull. The client wanted the tiles restored to a shiny finish and additionally wanted the two cracked tiles replaced in the kitchen doorway.

Terracotta Tile Replacement

I started by removing the two cracked tiles using an angle grinder and cleared away the grout to leave the edges of the remaining tiles as smooth as possible.

Terracotta Tiled Kitchen Replacement in Willingale Before Terracotta Tiled Kitchen Replacement in Willingale After

Cleaning a Dull and Dirty Terracotta Tiled Floor

The next stage was to strip and clean the tiles and grout lines. I dampened the tiles with water before applying Tile Doctor Remove and Go, a product which breaks down existing sealers so they can be scrubbed off the tiles and rinsed away. To make the work easier I used a rotary machine fitted with a black scrubbing pad to work the solution in and then pressure washed them using a spinner tool attached to a wet extraction machine mounted in my van. This process blasts any remaining dirt and sealer from the stone and grout lines and vacuums the waste into a holding tank in the van.

Terracotta Tiled Kitchen Repaired and Stripped in Willingale Terracotta Tiled Kitchen Repaired and Stripped in Willingale

This process took most of the day, but just before I left I replaced the broken tiles with two new ones and re grouted them in place, fortunately these tiles were still available and so it wasn’t difficult finding replacements. The tiles and grout were left to dry over night.

Sealing a Terracotta Tiled Floor

The following morning I damp tested the floor before beginning to seal the floor, this is an important check as damp can upset the sealer and lead to unexpected results.

Terracotta Tiled Kitchen Testing for Damp Willingale

Once I was satisfied the tiles were dry I applied five coats of Tile Doctor Seal and Go, leaving the stone with a healthy lustre. Seal and Go is a topical sealer that is highly recommended for Victorian, Terracotta and Quarry tiles and being water based it doesn’t leave a smell as it dries.

Terracotta Tiled Kitchen Cleaned and Sealed in Willingale Terracotta Tiled Kitchen Cleaned and Sealed in Willingale


Terracotta Kitchen Tiled Floor Maintained in Essex

Terracotta Tiled Kitchen Floor Repaired, Cleaned and Sealed in Willingale Read More »

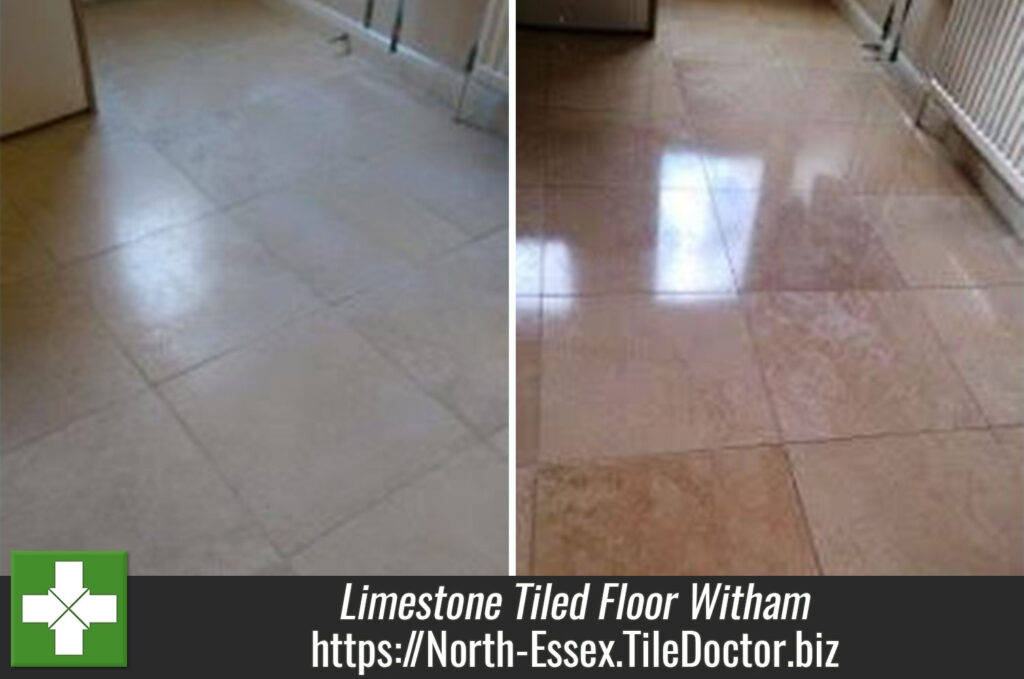
Limestone tiles after cleaning Witham

Shine and Lustre restored to a Limestone Tiled Floor Witham

These Limestone tiles had been laid in a modern property in Witham, an Essex town that sits between Chelmsford and Colchester. The property owners had spent many hours over the years cleaning and sealing the floor to maintain its condition, but while the tiles were in certainly in good shape, they had lost their shine and lustre. The result was quite a dull looking floor that could certainly be improved on.

When the property owners contacted me about the problem, I informed them that due to the hardness of the stone only a process known as burnishing, which involves cleaning and polishing with special gritted pads instead of a liquid product, would do the trick to restore the Limestone tiles.

Burnishing a Limestone Tiled Floor

We use burnishing to restore several types polished stone to looking their best, including Limestone, Marble, and Travertine. Tile Doctor’s burnishing system consists of four diamond encrusted twister pads with varying levels of grit. The pads are graded so that each hones the stone to a greater degree than the previous one, resulting in the build-up of a durable polish and shine on the stone.

Using a small amount of water as lubrication, I worked my way through the system, applying each pad in succession, beginning with the Coarse grit pad, before on to Medium, Fine and Very Fine pads. While polishing the tiles, the diamond encrusted pads also serves to break down any dirt. Thankfully, these tiles were already well taken care off and were not currently suffering from heavy soil build up.

After completing the burnishing process, I promptly rinsed away any cleaning slurry and left the floor to dry.

Limestone tiles before cleaning Witham Limestone tiles after cleaning Witham

Sealing a Limestone Tiled Floor

I returned the property once the floor had dried completely to seal the tiles, with my choice of sealer being Tile Doctor Colour Grow. I applied three coats of the sealer to the tiles, before buffing them for a final time.

Colour Grow is an ideal sealer for Limestone for two main reasons. Firstly, it is an impregnating sealer, meaning it penetrates deep into the pores of the Limestone to provide robust protection against ingrained dirt. Secondly, it contains colour intensifying properties which enhance the natural colours in the Limestone.

I took a couple of photographs before and after (above) in which you can see a significant improvement in the shine and lustre of the Limestone tiles. Most of the cream and tan shades in the Limestone were practically invisible before the burnishing was carried out and a fresh seal was applied – now the tiles stand out as the most prominent feature of the room. Needless to say, the customer was very satisfied.


Restoring the appearance of a Limestone tiled floor in Essex

Shine and Lustre restored to a Limestone Tiled Floor Witham Read More »

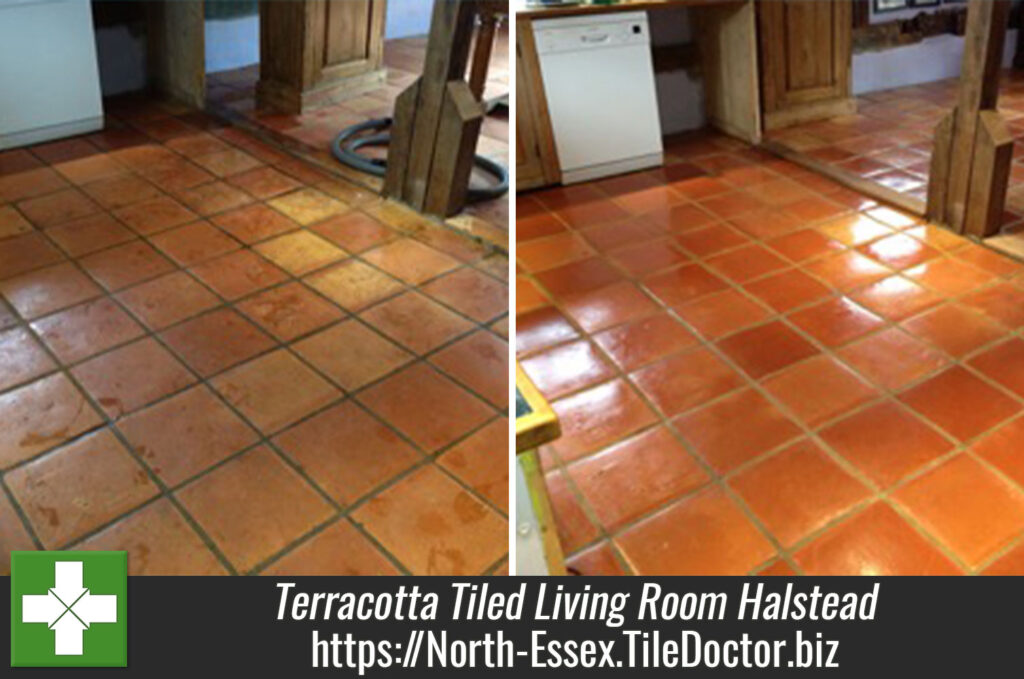
Terracotta Tiled Floor After Cleaning in Halstead

Removing 20 Years of Dirt From a Terracotta Tiled Living Room in Halstead

The old town of Halstead, Essex, meaning ‘safe place’ or ‘place of refuge’ in Old English, was the site of this job. Similarly, historic is the property I was called to, a fantastic seventeenth century thatched cottage, situated just on the outskirts of the town.

The owner was keen to have her Terracottatiled living room restored; the tiles had been laid twenty years prior and had been given very little treatment over the following two decades. They were now very dirty and dull looking and were certainly in need of a deep clean, followed by the application of a fresh seal to maintain condition.

Terracotta Tiled Floor Before Cleaning in Halstead

Cleaning a Dull and Dirty Terracotta Tiled Floor

To begin the cleaning process, Tile Doctor Pro-Clean, a heavy duty, high alkaline product designed for cleaning Terracotta and many other types of natural stone, was applied liberally to the floor in a dilute form. The product was then left to dwell for a short period, allowing it to seep into the pores of the stone, before being scrubbed into the tiles using a rotary machine fitted with a black scrubbing pad.

The grout lines should usually be treated individually in the cleaning process since the dirt and stains found here can prove very stubborn, and so they were scrubbed carefully with a special grout brush.

Following this a high pressure spinning tool, which is powered by a machine in my van, was used to blast stubborn ingrained soils from the grout and tile. This tool also serves to rinse the tiles and vacuum all slurry and chemicals back into a waste tank on the van.

The floor was then left to dry fully overnight, allowing for any excess moisture to disappear and leaving the tiles ready to be sealed the following day.

Sealing a Terracotta Tiled Floor

In the morning I arrived back at the property and promptly for any dampness. Once satisfied with the condition of the tiles, I proceeded to apply Tile Doctor Seal and Go. This is an odourless, water-based topical sealer that builds up protection on the surface of the tiles, providing a durable and aesthetically pleasing satin finish.

Terracotta Tiled Floor After Cleaning in Halstead

Since Terracotta is a very porous material, I was required to apply five coats of the sealer, allowing enough to fill the pores completely to offer protection from within.

The results of the restoration were very pleasing for both the customer and myself. I think you will agree that the floor no longer looks like it hasn’t been cleaned for twenty years – in fact, it looks almost brand new!


Deep Cleaning a Badly Maintained Terracotta Tiled Living Room in Essex

Removing 20 Years of Dirt From a Terracotta Tiled Living Room in Halstead Read More »

Scroll to Top